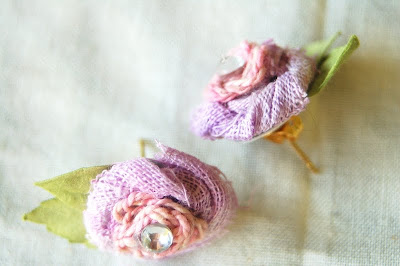
A yummy new batch of inky vintage gauze trim just hit the etsy shop shelves and I couldn't wait to share this {SWEET & SIMPLE} earring tutorial with you all.
These charming little rosette studs are easy and quick. You will want to make a dozen pairs! They only took me a half hour to complete, including gathering my supplies...so grab some {VINTAGE TRIM HERE} before it is all gone!
First, gather your supplies. Don't worry about having each item in the photograph...as long as you have the inky vintage trim you can use anything you love or have on hand to embellish your rosette...you will need:
*scissors*glue gun or strong adhesive of your choice
*silicone pad for creating a circle of hot glue
* two earring posts and two backs
* something you would like to use to cut out your leaves from.(this can be cardstock, fabric, canvas, or anything else that will give you a good leafy texture) I used a leftover prima leaf I had on hand.
*small hole punch (size will depend on how large you create your rosette)
OPTIONAL: tweezers, string or yarn, rhinestones, buttons, etc.
For my rosette earrings, I cut two 6 inch lengths of {plum pudding inky vintage trim}
and tied a small knot in the end of each piece. Trim end of knots.
Next, using your silicone glue gun pad, create a small circle of hot glue.
Make sure it is pretty thick. Squeezing gently with constant light pressure works best.
Place your knot in the center of the glue and let it set for 10-20 seconds. This just helps the glue gel a little bit.
Now start GENTLY twisting and wrapping your inky gauze trim around the center know, patting it in close to the trim it is wrapped around. You want a nice tight rosette when you are finished. Continue wrapping until your trim has covered your entire glue dot and then trim with scissors. Press flat gently and peel SLOWLY off of the mat. Tack end of trim to back side of rosette.
Now take your fabric or cardstock or leaf material and cut four small leaf shapes. These DO NOT have to be perfect. Flowers in the wild are not perfect and this gives your earrings character.
Choose two leaves and layer them until you have your desired effect. Glue them together.
Set your leaves aside and go back to your rosette. Use whatever embellishment you like here (or none if you like...the pair I wear has NO BLING or anything, just SWEET AND SIMPLE!) and add it to your rosette's center. I used some inky dyed string for my center (coming soon to etsy shop) to give my center a little nesty look. Just twist and twirl the string until you have the shape you want and tack down with a dot of hot glue. Then I added a small rhinestone with a dot of hot glue.
Now take some old leftover cardstock or thin cardboard. ( I used some recycled packaging from my rhinestones ) Punch two circles and adhere one to the back of each earring. This will help disguise all of your layers of glue and leaves and flower.
Now take your earring post and clue that to the center of your cardstock. Let dry for a few minutes or until hot glue has completely cooled.
Your beautiful {INKY VINTAGE GAUZE TRIM} has been transformed into a darling pair of rosette earrings.
Enjoy!


3 comments:
Love the earrings - thanks for the tutorial!
So very cute, Rae! And sooo creative! You're such a sweetie to share the tutorial!
Hugs! Hope your week is fab!!
Becky
Your creations are soooo inspiring, Becky. Pretty and charming rosette studs, I think this will be a good match to my shocking pink wardrobe. Thanks for the tutorial. Keep it up!
custom made jewelry
Post a Comment